Wednesday, December 9, 2009
Mexican Chocolate Capirotada
Capirotada is simply Bread Pudding. Traditional Capirotada doesn't contain chocolate, by hey, I figured it couldn't hurt. Actually, I like this one even better, because of the Mexican chocolate of course. Capirotada is one of those traditional Mexican dishes often served around the holidays. And we're certainly right on top of those glorious days, aren't we? I really hope you enjoy my version of Capirotada. I added the traditional recipe at the end for all you non-conformists! :) Enjoy.
Chocolate Capirotada
8 slices of pound cake, cubed
3 eggs, beaten
1/3-cup milk
1-teaspoon cinnamon
2 tablespoons brown sugar
1 cup chopped pecans
1 cup dried cherries or raisins
1 medium granny smith apple, diced
1 cup Jack cheese, shredded
Chocolate Sauce*
Preheat oven to 350°.
Butter a glass-baking dish.Place half the pound cake cubes into the baking dish.Mix eggs, milk, cinnamon and brown sugar and pour half of this mixture over the top of the cake cubes in dish.Sprinkle half pecans, cherries or raisins, apple, and cheese on top.Add another layer of pound cake cubes followed by the egg mixture and remaining ingredients. Top with chocolate sauce.Bake 25 minutes or until cheese has melted. Serve with remaining chocolate sauce if desired.
*Chocolate Sauce:
1 cup half and half1 stick cinnamon½ disk Mexican Chocolate, choppedCombine half and half and cinnamon stick in medium sauce pan and heat to scalding. Lower heat and add chocolate. Whisk until chocolate melts and remove from heat. Remove cinnamon stick before using.
*******************************
Traditional Capirotada (Bread Pudding)
8 slices bread, toasted
3 eggs, beaten
5 tablespoons milk
1 teaspoon cinnamon
2 tablespoons brown sugar
½ cup toasted, slivered almonds
½ cup unsalted peanuts
½ cup walnuts, chopped
½ cup raisins
1 medium apple, pared, cored, and thinly sliced
1 cup Jack cheese, cut into small cubes
Panocha Syrup*
Preheat oven to 350º.
Butter a square baking dish. Place four bread slices in pan.Mix eggs, milk, cinnamon, and brown sugar. Pour half of milk, eggs, and sugar mixture on top. Sprinkle with half of remaining ingredients.Add another layer of bread and repeat as above. Top Capirotada with Panocha Syrup and bake 25 minutes or until cheese is melted. Serve warm or reheat, covered, for 15 minutes.Makes 8 to 10 servings.
*Panocha Syrup:
2 cups brown sugar2 cups water1 cinnamon stickCombine ingredients in a medium size saucepan. Bring syrup to a boil. Lower heat and simmer approximately 15 minutes until syrup is slightly thickened. Remove cinnamon stick.
Wednesday, December 2, 2009
Hershey Kiss Cookies for my Son
On Sunday Bob and I had a lovely surprise. My son Mikey came home for an unexpected visit. He was here on business but also to visit us. My heart was elated. I cried like nobody’s business. It was then that I decided to make his favorite holiday cookies.
These cookies come from a small cookbook I bought 20 years ago when we as a family traveled up to Pennsylvania to visit my mother-in-law. We drove to Hershey, PA on a day trip to visit the factory. (I’ve always been a chocoholic!) Driving into the town, we could smell the beautiful aromas of chocolate. The whole town was surrounded by chocolate. They even use the shells of the cocoa bean to fertilize the wondrous gardens they have.
In picking up various souvenirs at the shop, I also purchased this little cookbook. A few simple recipes made with Hershey’s chocolate. Of all the wonderful creations in this book, one stood out above the rest: Cocoa Kiss Cookies. So for 20 years we’ve been baking these every holiday season.
The tasty shortbread/butter cookie dough flavored with cocoa surround a delicious Hershey’s Kiss. I usually have to make 3 different types: one recipe without the pecans for my daughter Lily, one recipe with pecans and no powdered sugar for Bob and the original recipe for my son Mike.
I do hope you try these. They really are very good. Enjoy. :)
(Look at the delicious Hershey's Kiss right in the center of the cookie.)
Cocoa Kiss Cookies
(from the Hershey’s Make It Chocolate Cookbook)
1 cup (2 sticks) softened butter
2/3 cup sugar
1 teaspoon vanilla extract
1 2/3 cups all purpose flour
¼ cup Hershey’s cocoa
1 cup finely chopped pecans
54 Hershey’s Kisses, unwrapped
Confectioner’s sugar
In a large bowl cream butter, sugar and vanilla until light and fluffy.
Combine flour and cocoa and blend into creamed mixture.
Add nuts and combine until well blended. Chill dough for 1 hour or until firm.
Heat oven to 375 degrees.
Mold 1 tablespoon of dough around each unwrapped Kiss, covering Kiss completely.
Shape into balls and place on ungreased cookie sheet. Bake for 10 to 12 minutes.
Cool slightly then remove from cookie sheet onto wire rack.
Roll in confectioners sugar. Makes about 4 to 4 ½ dozen cookies.
Tuesday, November 24, 2009
Holiday Cocktails
Chocolate Pumpkin Pie Cocktail(Sandra Lee, Cocktail Time Book)
¾ ounce vanilla flavored vodka
½ ounce Irish Cream liqueur
½ ounce Kahlua
½ ounce crème de cacao
1/8 teaspoon pumpkin pie spice
Pinch of cayenne pepper
Ice
Combine all ingredients in a cocktail shaker and shake until very cold. Strain into a chilled martini glass. Sprinkle lightly with pumpkin pie spice. Makes one drink.
Of course you can't go without having some Hot Chocolate on hand for those chilly nights either. Here's one I decided to call, Not Your Mama's Hot Chocolate. It's absolutely decadent. It's creamy; it's made with real chocolate; it has a peppermint (candy cane) flavor that makes it feel like Christmas morning.
Not Your Mama’s Hot Chocolate
1 cup half and half
1 cup (liquid) Coffee-Mate Peppermint Mocha Coffee Creamer
¾ cup chocolate chips
½ teaspoon ground cinnamon
2 ounces Peppermint Schnapps
Heat half and half along with coffee creamer, chocolate chips and cinnamon. Stir, over medium heat, until chocolate is melted. Divide schnapps into each cup and top with hot chocolate. If you want to make this for the kiddos, substitute a teaspoon of peppermint extract for the schnapps. Makes 2 latte size cups or 4 regular size cups.
Happy Thanksgiving everyone.
Saturday, November 21, 2009
Chocolate Caliente Cookies
I hope you try these, they really are tasty. AND you can’t go wrong with chocolate. Pack some in small boxes or goody bags to have on hand for dinner guests or friends or neighbors. They make a nice little surprise that say Happy Holidays.
Chocolate Caliente Cookies
A Nestle Toll House Recipe
Ingredients:
1 3/4 cups (11.5-oz. pkg.) NESTLÉ® TOLL HOUSE® Semi-Sweet Chocolate Chunks, divided
1 1/2 cups all-purpose flour
1 1/2 teaspoons ground cinnamon
1 teaspoon baking powder
1/4 teaspoon salt
1/16 teaspoon (pinch) ground cayenne pepper
1/2 cup (1 stick) butter, softened
1/2 cup granulated sugar
1/2 cup packed light brown sugar
2 large eggs
1 teaspoon vanilla extract
Directions:
MICROWAVE 1 cup chunks in medium, uncovered, microwave-safe bowl on HIGH (100%) power for 1 minute; STIR. Chunks may retain some of their original shape. If necessary, microwave at additional 10- to 15-second intervals, stirring just until chunks are melted.
COMBINE flour, cinnamon, baking powder, salt and cayenne pepper in small bowl. Beat butter, granulated sugar and brown sugar in large mixer bowl until creamy. Add eggs and vanilla extract; beat well. Add melted chocolate; stir until blended. Gradually stir in flour mixture. Refrigerate for 2 hours.
PREHEAT oven to 350º F. Line baking sheets with foil.
SHAPE dough into 1 1/2-inch balls. Place 3 inches apart on baking sheets.
BAKE for 12 minutes or until cookies are puffed and centers are set but still soft. Immediately place remaining chunks, about 5 to 6 chunks per cookie, onto tops of cookies. Cool on baking sheets for 2 minutes; remove to wire racks. Allow chunks to soften and spread melted chocolate evenly over tops of cookies.
TIP:• For a richer chocolate flavor, substitute three 4-ounce bars of NESTLÉ® TOLL HOUSE® CHOCOLATIER 53% Cacao Dark or 62% Cacao Bittersweet Baking Chocolate, broken into pieces, for the semi-sweet chocolate chunks.
Saturday, November 14, 2009
Cocoa Spiced Chicken
Chocolate is delicious as a dessert. It is also a delightful suprise when used as a savory flavoring on meats and poultry.
I baked this Cocoa Spiced chicken breast but it is also delicious when grilled. In keeping with the cooking for two, taking out a couple of chicken breasts out of the freezer and spicing it up with "chocolate" makes a special dinner. The addition of a salsa as a topper, in this case made with mangos and avocados makes this simple piece of poultry a complete dinner.
The salsa is the usual combination of diced onions, chopped tomatoes, diced mangos, diced avocados, minced jalapeños and drizzled with a mixture of lime and olive oil and seasoned with salt and pepper.
To complete the dinner serve crusty french bread and a tall, cold gass of Tecate (Mexican Beer).
Spicy Cocoa Rubbed Chicken with Salsa
(recipe from the Southern Living Magazine)
2 tablespoons light brown sugar
1 ½ teaspoons chili powder
1 teaspoon unsweetened cocoa
¼ teaspoon ground cumin
¼ teaspoon freshly ground black pepper
1 ¼ teaspoon salt, divided
2 large chicken breasts
2 limes
2 teaspoons of honey
1 avocado, chopped
1 cup chopped fresh mango
¾ cup large-diced tomato
¼ cup finely chopped onion
1 minced jalapeño
4 teaspoons chopped fresh cilantro
Preheat grill. Use an outdoor or an indoor grill.
Stir together brown sugar and next four ingredients plus ½ teaspoon salt in a small bowl. Rub chicken with the sugar mixture, coating well.
Grate zest from limes to equal 1 tablespoon; squeeze juice from limes to equal 2 tablespoons. Whisk together honey, lime zest and lime juice in a medium bowl. Add avocado and toss to coat. Stir in mango, next 3 ingredients and remaining ¾ teaspoon salt.
Grill chicken until thermometer inserted into thickest part registers 165 degrees. Serve with mango-avocado salsa.
Wednesday, November 11, 2009
Mexican Chocolate Biscotti
I’d never made biscotti before. My daughter-in-law had made some for me a couple of years ago for Christmas so I thought I’d try it with some Abuelita’s Mexican Chocolate.
My family knows Christmas morning (for me) is not complete without a large cup of java and some biscotti. The holidays are when I love to indulge with this decadent bit of crispy cookie dipped in coffee.
I’m anxious this year for Christmas to come around more than usual. My children will be here. Ask me if I’m excited??!!! I’ve started making my food and shopping lists and we haven’t even hit Thanksgiving yet.
So, to keep me somewhat sane, I decided to experiment with this basic biscotti recipe adding some Abuelita’s chocolate and chopped almonds. I can see the pounds piling back on. I’ve managed to lose some weight in the last few months and I promise to take it back off after the holidays. But for now, it’s time to celebrate. My children are coming and I’m in heaven.
Mexican Chocolate Biscotti
Makes: 2 dozen cookies
Ingredients
1/3 cup butter, softened
2/3 cup packed brown sugar
2 teaspoons baking powder
1/2 teaspoon salt
2 eggs
¼ teaspoon espresso powder (or instant coffee granules)
1/4 cup unsweetened cocoa powder
1-2/3 cups all-purpose flour
1 cup toasted almonds, chopped*
4 ounces Mexican chocolate, chopped
6 ounces special dark chocolate or bittersweet chocolate, chopped
1 teaspoon Kahlua
2 teaspoons shortening
Directions
1. Preheat oven to 375F. Lightly grease a cookie sheet; set aside. Beat butter in a large mixing bowl with an electric mixer on medium to high speed for 30 seconds. Add brown sugar, baking powder, and salt. Beat until combined, scraping side of bowl occasionally. Beat in eggs and cocoa powder. Beat in as much flour as you can with the mixer. Stir in any remaining flour, the hazelnuts, and 4 ounces bittersweet chocolate with a wooden spoon.
2. Divide dough in half. Shape each portion into a 9-inch-long roll. Place rolls 4 inches apart on prepared cookie sheet; slightly flatten each roll to 2 inches wide.
3. Bake in preheated oven for 20 to 25 minutes or until a wooden pick inserted near centers comes out clean. Cool on cookie sheet for 45 minutes. Reduce oven temperature to 325F.
4. Cut each roll diagonally into 1/2-inch-thick slices, slicing carefully with a serrated knife. Place slices, cut sides down, on cookie sheet.
5. Bake in 325F oven for 8 minutes. Carefully turn slices over and bake for 7 to 9 minutes more or until dry and crisp. Transfer to wire racks and let cool, about 1 hour.
6. Microwave chopped chocolate and shortening in a small microwave-safe bowl on 50 percent power (medium) for 1 to 2 minutes or until melted, stirring twice. Dip one end of each cookie into melted chocolate; let excess drip back into bowl. Place cookies on waxed paper; let stand until set. Makes 2 dozen small cookies. If you want larger biscotti cookies make just one large log.
*Note: To toast nuts, spread them in a single layer in a shallow baking pan. Bake in a preheated 375F oven for 4 to 5 minutes or until nuts are slightly golden brown, stirring once or twice. Chop nuts and set aside.
To Store: Place cookies in layers separated by pieces of waxed paper in an airtight container; cover. Store at room temperature for up to 3 days or freeze for up to 3 months. Thaw cookies, if frozen, before serving.
Biscotti (or any cookie) wouldn’t be complete without some coffee or hot chocolate. What better way to serve the Mexican Chocolate Biscotti than with some Spiced Mexican Mocha. What can I say? I’m a Mexican Chocoholic!
Spiced Mexican Mocha
Makes 6 servings
Ingredients
4 cups strong coffee, freshly brewed
2 cups whole milk, or half and half, or cream :)
1 tablespoon Kahlua
½ cup sugar
1 teaspoon ground cinnamon
2 1/2 ounces bittersweet or Mexican chocolate, like Abuelita's or Ibarra’s, grated
Vanilla ice cream or frozen whipped cream, optional
Chili powder, optional
Directions
Brew coffee and keep on warmer.
Bring milk to a simmer over low heat. Add next four ingredients and stir until chocolate is melted. Add strong coffee to milk mixture.
Whisk or blend it to make it light and foamy. The traditional way to do this is with a molinillo. A molinillo is a special wooden tool used for creating foam in hot chocolate.
If you desire, top with a scoop of vanilla ice cream or frozen whipped cream and sprinkle (lightly) with chile powder or cinnamon.
You may make this ahead and reheat. Make sure to either whisk it or blend it in a blender to make it light and foamy before serving.
Saturday, October 31, 2009
Boris the Spider Cake
The cake itself is pretty easy to make, so is the decorating. I am disappointed that I resorted to using plastic spiders, but I couldn’t find the large gummy spiders I had originally seen at the bake shop. I bought little gummy spiders but they just looked like a little gummy glob of nothing. Now, if I had read Jenn’s left-over queen’s blog before completing this, I could have made my spiders out of prunes like she did. They look really cool – so life-like. Be sure and check out her blog to see for yourself.
The spider eggs on top are brownie bites covered in melted chocolate and sprinkled with some black and orange sprinkles. If you have white cotton candy, you can wrap some around the eggs to make it look like a sack. I didn’t, maybe next time. The sides of the cake are just shaved chocolate from a Ghirardelli Bittersweet bar.
Making a holiday like Halloween fun for your family isn’t difficult. It’s fun with a little imagination. I love Halloween. It’s different now with the kids gone, but it doesn’t mean I can’t still have some fun.
Yeah, it’s a big cake for Bob and me, but I think sharing with our next door neighbors kids will be cool.
Happy Halloween everyone. Here's a clip of the Boris the Spider song just for you.
Other Halloween posts you might enjoy:
Rat’s, Cat’s and Witches Hats
Mexican Chocolate Capirotada
Mexican Chocolate Drizzled Caramel Popcorn
Thursday, October 22, 2009
Chocolate Tiramisu for 2
(recipe from the Semi-Homemade Magazine, Oct. 2009)
1 (8-ounce) package cream cheese, softened
¾ cup powdered sugar
2 tablespoons cocoa powder
1 cup heavy whipping cream, divided
3 tablespoons Kahlua
¾ cup espresso or strong-brewed coffee cooled to room temp
1 (3-ounce) package soft lady fingers
3 tablespoons powdered sugar
Garnish: cocoa powder
In a medium bowl, combine cream cheese, ¾ cup powdered sugar and cocoa powder. Beat at medium speed until smooth. Add ½ heavy cream and 2 tablespoons Kahlua, beating until blended and smooth.
In a small bowl, combine espresso and remaining 1 tablespoon Kahlua.
Fill bottom of espresso cups (or other decorative dessert cups) with a quarter teaspoon espresso mixture. Line the bottom of each cup with lady fingers, tearing them to fit the cups. Drizzle with 1 teaspoon espresso mixture. Spoon about 1 ½ tablespoons cream cheese mixture over the lady fingers. Repeat layers.
In a small bowl combine remaining ½ cup heavy cream and 3 tablespoons powdered sugar. Beat at high speed with mixer until soft peaks form and carefully spoon over tiramisu cups. Garnish with additional cocoa powder if desired. Store covered in refrigerator until ready to serve.
Here you can see the bits of lady fingers sticking out. (Should have made TWO!)
Thursday, September 24, 2009
Marble Magic Brownie Cake
(from “A Passion For Baking” by Marcy Goldman)
Marcy Goldman’s baking book is one of those books I bought on a whim. I wasn’t very familiar with her work as a pastry chef, but in skimming through her book, all the delicious bread and dessert recipes really caught my attention.
I’ve swallowed up her gorgeous photographs and have gone back to imprint some of her baking secrets into my mind. She is the first one I’ve read who talks about double sheeting –using double cookie sheets instead of one to keep from browning the bottoms of your cakes, cookies, breads, etc., from baking too quickly before the center is ready. After trying her tip the first time, I’ve never gone back. I use this method in all my baking. It really works.
One of the most mouth-watering recipes I read about in her book (well, actually an additional little booklet called, what else (?) “CHOCOLATE, CHOCOLATE, CHOCOLATE” that came with my cookbook) was called Marble Magic Brownie Cake. It’s rich, it’s dense, it’s amazingly delicious and it’s not for the faint of heart, meaning if you can serve yourself a sliver, you’re OK, if not, expect a couple of pounds to be added on.
When I first try out a new recipe, I try and follow it to the letter. After that, I tweak it and make I my own. Aside from maybe making it in 2 smaller pans or maybe even as cupcakes, I’m leaving this one as is. This is a great recipe to have on hand for the upcoming Holidays. Enjoy everyone.
Look at those beautiful swirls of fudgy brownie and cake.
Marble Magic Brownie Cake
1 box yellow or white cake mix
Brownies:
2 cups unsalted butter, melted
2 cups white sugar
1 ½ cups firmly packed brown sugar
2 teaspoons vanilla extract
6 large eggs
1 ½ cups cocoa powder, measured and then sifted
2 cups all-purpose flour
½ teaspoon baking soda
2 cups semi sweet chocolate chips
Preheat oven to 350 degrees.
Line a baking sheet with parchment paper and set aside. Generously spray a 1 x 9-inch pan with non-stick cooking spray and line bottom with a sheet of parchment paper.
In a large food processor, prepare cake mix according to directions. Spoon cake mix batter into a bowl. Do not wash food processor bowl.
(I did do this differently. I don’t have a very large food processor, so I used 2 mixing bowls and a hand mixer.)
For brownies, using food processor blend butter, sugars, vanilla and eggs. Add cocoa, flour baking soda and salt. Blend well to a thick smooth batter. Spoon half of brownie batter into prepared pan. Spoon half of cake mix batter over the brownie batter.
Dollop the remaining batters of the top of the cake mix batter and swirl with a knife.
Bake until done, about 1 hour to 1 hour and 20 minutes (Mine took about 1 hour and 10 minutes.) It’s ready when cake has risen and springs back when lightly pressed with your fingertips.
Remove from oven and sprinkle with chocolate chips. Allow to stand 15 to 20 minutes and then spread the chips evenly over the top with a metal spatula. Cool completely and cut into squares.
Saturday, September 12, 2009
Chocolate Pecan Pie Bars
I wanted to surprise Bob with a filling dinner and a yummy dessert when he got home from work. He loves Pecan Pie, but I usually only make it around the holidays, so I opted for these mouthwatering Pecan Pie Bars.
I’ve made them before with either a “dunk” into melted chocolate or just plain. Today I was inspired by a recipe I saw on the Brown Eyed Baker’s blog with her Chunky Pecan Pie Bars.
I sure hope you try these luscious bars. They’re not difficult to make and are rather tasty. Look at all those pecans and chocolate chunks!
Chocolate Pecan Pie Bars
(Inspired by The Brown-Eyed Baker)
For the Crust:
1½ cups all-purpose flour
½ cup (1 stick) butter, softened
¼ cup packed brown sugar
¼ teaspoon cinnamon
Filling:
3 large eggs
¾ cup corn syrup
¾ cup granulated sugar
2 Tablespoons butter, melted
1 teaspoon vanilla extract
1¾ cups coarsely chopped semisweet or bittersweet chocolate (or chocolate chunks in a bag!)
I used chopped Mexican chocolate
1½ cups chopped pecans
1. Preheat oven to 350°F. Grease a 9×13-inch baking pan.
2. For the crust, mix together the flour, butter, brown sugar and cinnamon until crumbly. Press into the baking pan and bake for 12-15 minutes or until lightly brown.
3. For the filling, beat the eggs, corn syrup, sugar, butter and vanilla extract with a wire whisk. Stir in the chocolate chunks and pecans. Pour evenly over the baked crust and bake for 25-30 minutes or until set.
4. Cool in the pan on a wire rack. Cool completely and cut into bars. Store in an airtight container at room temperature (or in the refrigerator if you live in a warm/humid area with no air conditioning).
Enjoy your weekend everyone.
Friday, September 4, 2009
Black and White Pound Cake
From the first time I tried this recipe, I knew it was a keeper. It has got to be the most delicious, moist and rich tasting pound cake I’ve ever had and believe me, I’ve got a ton of pound cake recipes on file. Over the next two months I will bring them to you (perhaps with some variations) via this blog.
Pound Cake is one of those desserts that is so versatile. If it’s rich and moist, just slice it and serve it with a good cup of coffee or a tall glass of milk. If you think it needs a little something, top it with a scoop of delicious homemade ice cream, or make a simple, yet tasty sauce to go over it and maybe some fresh fruit.
The origins of the pound cake date back to the 18th century with its birth in the Northern European countryside. The name pound cake came about because of it’s composition of ingredients. 1 pound of flour – 1 pound of butter – 1 pound of sugar – 1 pound of eggs! Can you imagine making something like this today? No leavening was used. It was whipped until sufficient air was incorporated into the batter to make it rise. There is a truly fascinating timeline description of the history of Pound Cake at the Food Timeline site.
This site excited me. I love studying the history of foods and the Food Timeline delves into many foods that we eat today. They state that food was not invented, but rather has evolved and they give you a wonderful history lesson on just about any vegetable, fruit, dessert, beverage, etc., that you can think of.
So, if you’ve ever wondered where a certain food had its beginnings, check out their site. You’ll stay on it for quite a while, I did.
For now, enjoy this delicious Black and White Pound Cake. I took that delicious recipe I found in the Better Homes and Gardens magazine, divided the dough, added some cocoa to half of it and layered it. Left over chocolate dough was spooned over the top in dollops and a toothpick run through it to give it some design.
This design looks like the Zodiac Taurus, doesn't it? Have a magnificent weekend everybody.
Classic Pound Cake
(BHG Magazine, May 2009)
6 eggs
1 cup cold, unsalted butter, cut into ½-inch pieces
1 (8 ounce) package cold cream cheese, cut into ½-inch pieces
2 ¾ cups sugar
1 tablespoon kosher salt
4 teaspoons pure vanilla
3 cups sifted cake flour
Let eggs stand at room temperature for 30 minutes, but no more than 2 hours. Generously butter and flour 2 loaf pans or 1 10-inch tube pan. Set aside. Using large bowl of stand mixer with a paddle attachment beat cold butter for 2 minutes on low speed. Dislodge butter from paddle periodically.
Add cream cheese and beat on low speed for 3 minutes again dislodging from paddle a few times. Still mixing on low, add sugar in a slow continuous stream. This should take about 1 ½ to 2 minutes. Add salt. Continue creaming for 5 minutes. Scrape sides and bottom of bowl halfway through. Increase speed to medium and continue mixing 2 minutes more, scraping once.
Add eggs, one at a time, beating 20 to 30 seconds after each addition. Scrape sides and bottom of bowl after first 3 eggs. Beat in vanilla with last egg.
Gradually add 2 1/2 cups of the sifted cake flour on low speed, mixing until just blended. Turn off mixer and fold in remaining flour by hand with a rubber spatula, just until combined.
Turn batter into prepared pans and shake gently to distribute batter. Drop pans onto counter to dislodge large air pockets.
Place on center rack of cold oven. Turn oven setting to 300 degrees. Bake for 1 hour and 15 minutes without opening door. Test for doneness with a cake tester or toothpick.
Transfer to cooling rack and allow to cool for 10 minutes before removing from pans. Cool completely before serving.
* In retrospect, I think that instead of using 1/2-cup cocoa powder to flavor the “black” side of this pound cake, I will use melted chocolate next time. The pound cake was delicious, but the dark half was a smidgen less moist than the lighter half. Experiment for yourself and see which you think is better.
Sunday, August 30, 2009
Mexican Chocolate "Speckled" Wedding Cookies
I’ve read recipes of Mexican Wedding Cookies for a long time now. The recipe resembles a shortbread recipe with some nuts incorporated into the dough and then dusted with powdered sugar when they come out of the oven.
Have I ever seen them at any Mexican wedding I’ve ever attended? NO. The traditional wedding cookie here in El Paso is the biscocho. I’ve always known biscochos as Polvorones. I learned how to make these with my Grandmother, Mi Chita, by memorizing the ingredients and many years later committing them to paper. These delightful little cookies are very often found at many Southwestern gatherings such as weddings, birthdays, baptismals and holidays like Christmas.
But my curiosity got the better of me. I’ve made the Pecan Sandies recipe found in the old BHG cookbook. This recipe reminded me of that. I looked in the Food Network recipe archives and found one that I knew I had all the ingredients for. Of course, I had to tweak it. I added some Mexican chocolate bits to it. The taste is quite delicious. So maybe I don’t go with the norm and make these as wedding cookies, but they do make a great treat. Enjoy.
(Mexican Chocolate Speckled) Wedding Cookies http://www.foodnetwork.com/recipes/mexican-wedding-cookies-recipe/index.html
( I made half of the recipe)
Ingredients
1 pound soft unsalted butter (2 sticks)
1 cup powdered sugar (1/2 cup)
2 tablespoons vanilla (1 tablespoon)
1 teaspoon salt (pinch)
2 cups finely chopped pecans (1 cup)
5 cups sifted pastry flour (2 ½ cups)
Powdered sugar for dusting
3/4 cup Mexican chocolate chopped into tiny bits
Directions
Preheat oven to 350 degrees. Beat butter and powdered sugar in mixer until light and fluffy, about 10-15 minutes.
Add vanilla, salt and pecans. Fold in Mexican chocolate bits. Remove from mixer and stir in pastry flour by hand being careful not to over mix. Refrigerate for 30 minutes to stabilize the dough.
Form into football shapes about the size of small walnuts and place on a buttered cookie sheet.
I used a cookie scoop to form small round dough shapes. Press lightly with bottom of lightly-floured glass.
Bake 10-12 minutes or until just beginning to get the slightest bit colored on the bottom. Remove upon the first sign of color and set on a rack to cool. When cool enough to touch place in a bowl with powdered sugar on top and bottom and toss gently.
Occasionally toss with sugar while cooling, trying to get as much sugar as possible to stick. When cold, place cookies in airtight container and cover until ready to serve.
Monday, August 24, 2009
Rice Pudding – 2 ways
Well, you guys have come to know me well enough to know that I would take that delicious recipe and attempt a chocolate version. I wasn’t really sure how it would come out; I’ve never tried it before. But let me tell you, I’m making this again. The Mexican chocolate (Chocolate Abuelita) addition to the basic recipe made it a keeper. It doesn’t take much to make something special for yourself or for your family; you just have to want to do it. See what you have at home…in the pantry, and dress up an old recipe. You won’t regret it.
Basic Rice Pudding Recipe
2 cups water
Pinch of salt
¾ cups uncooked long grain white rice
1 (12 ounce) can evaporated milk
1/3 cup sugar
1 stick cinnamon
1 tablespoon butter
1 teaspoon vanilla extract
1/3 cup raisins (or in my case, craisins…I love them)
2 squares Abuelita chocolate
¼ cup whole almonds
Ground cinnamon, optional
In a medium sized saucepan, bring water and salt to a boil. Add the rice and bring back to a boil. Cover and reduce heat to medium heat. Allow to cook for 25 to 30 minutes until rice is completely soft.Add the evaporated milk, sugar, cinnamon stick, butter and vanilla. Continue to cook on low heat (uncovered), occasionally stirring to keep from sticking, for about 30 minutes.
Divide the cooked rice in two. Add the craisins to half and the chocolate to the other. Once the chocolate has melted, fold in almonds. Sprinkle ground cinnamon to the “white” rice pudding if desired.
Check out the Southern version of this delightful dessert over at Tina's Mommy's Kitchen. You'll love that one too. Enjoy.
Wednesday, August 19, 2009
Spiked Espresso Cooler
Bob doesn’t get home until 8 o’clock tonight so I figured I’d treat myself to something special without getting the “look” and feeling guilty.
A little Mocha Kahlua, a little cream, some fresh espresso and two little (4 once) containers of coffee ice cream. Into the blender they go and my 102 degree hot afternoon cooled off rather nicely.
So here’s my way to stay cool in El Paso, A Double-Shot Espresso – Mocha Kahlua – Coffee Ice Cream Cooler. Delicious.
2 (4 ounce) cartons of ice cream, coffee or vanilla
2 shots espresso
1 shot Mocha Kahlua Liqueur
1 shot heavy cream (or half and half)
Whipped cream, optional
Place all ingredients in blender and blend. Pour into glass and top with whipped cream if desired. Enjoy.
Friday, August 14, 2009
Black and White Cookies
A few years go, we went to Mystic, Connecticut to visit my brother Jose and his family.
Before going, I knew that I wanted to visit New York at least for one day. I envisioned pretzels, hot dogs, street performers, taxi cabs (I refuse to take the subway – been there done that, won’t do it again!), and black and white cookies.
We took the train from CT into New York City. It was a lovely ride. Once getting to Grand Central Station, we walked and shopped and ended up eating at the Carnegie Deli. It was so good. The sandwiches were big enough to feed two people and the cheesecake dessert was large enough to feed four. My tummy was very happy.
What I never saw were the black and white cookies. I so wanted to savor that sponge-like sweetness covered in vanilla and chocolate fondant. Ah, well, maybe next time.
The thought has never left my mind though. So, I’m sitting here thinking, what the heck? Just make them at home. I’d seen the recipe in the Martha Stewart Cookie book I had as well as on the food network site, so I plunged ahead in hopes that my cookies would be just as good as what I’d read about them. I don’t (yet) know what New York Black and White’s (or Half Moons as they are sometimes called) taste like, but I sure did like the ones I made. I’m sharing them here with you. If you’ve seen or eaten the originals, don’t judge me too harshly. It was semi-difficult to get the white icing to cover completely, but they still taste delicious. Enjoy.
I used the Martha Stewart recipe for Black and Whites. The only difference was that I used Mexican Chocolate for the "black" side of the cookie.
Black and White Cookies
Martha Stewart Cookies
Ingredients
Makes 10.
1 cup all-purpose flour
2/3 cup cake flour, not self-rising
1/2 teaspoon baking powder
1/4 teaspoon salt
2 large eggs
3/4 cup granulated sugar
1/2 cup milk
6 tablespoons unsalted butter, melted and cooled
1/2 teaspoon pure vanilla extract
1/2 teaspoon pure lemon extract
2 cups confectioners' sugar, sifted
2 tablespoons light corn syrup, plus more if needed
1 1/2 ounces bittersweet chocolate, melted
Directions
Preheat oven to 350 degrees. Sift together flours, baking powder, and salt; set aside. In a medium bowl, whisk eggs and sugar until smooth. Add milk, and whisk to combine. Whisk in melted butter and extracts. Add flour mixture, and stir to form a smooth dough. Cover, and chill for 1 hour.
Line baking pans with Silpat nonstick baking mats. Using a 2-ounce scoop, drop five cookies per pan, 3 inches apart. Bake until edges are light brown, 12 to 15 minutes. Transfer cookies to a wire rack set over parchment paper to cool.
In a small bowl, combine confectioners' sugar, 3 tablespoons hot water, and corn syrup. Whisk until smooth. Using a small offset spatula, ice half of each cookie. Return cookies to rack to drip, if necessary.
Add chocolate to remaining icing. Stir until smooth. Add additional corn syrup to thin to desired consistency, if necessary. Spread chocolate icing over second half of each cookie. Allow cookies to set, about 10 minutes.
Hayley, from Buff Chickpea has a wonderful post on Black ad White Cookies. Here is a little of what she has to say about this tasty treat:
“Did You Know? "Back in the day, black and white cookies were actually made by bakeries from their leftover cake batters, with just a little extra flour mixed in so the cookie didn’t spread all over the place. Sometimes called Amerikaner Cookies, they’re also occasionally referred to as "half-moons" Upstate and in New England. However, with a chocolate cake base, not the traditional vanilla/lemon one, they’re not the same thing..." Deb of Smitten Kitchen.”
Another great recipe for black and whites was put out by Duff Goldman from Ace of Cakes. You might want to read his version.
Whichever version you decide to use, I'm sure they will be delicious. Have fun.
"Everyday People Cartoons
Friday, August 7, 2009
Espresso Muffins and Mexican Chocolate Frappuccino
The drink? It's my version of a Mexican Chocolate Mocha Frappuccino. The original recipe comes from the Recipe Zaar. And as we all do, I modified it to quench my own personal tastes. This recipe was also suppose to go up yesterday. My apologies to Megan from Megan's Cookin'. I'm sorry I let you down, but here it is. I hope you enjoy it. She's had some amazing coffee drinks on her blog lately which is what got me thinking about doing this one.
Hope you get the opportunity to give these little chocolate diddy's a try.
They are DELICIOUS.
Espresso Coffeecake Muffins
(Reeni at Cinnamon Spice and Everything Nice)
The changes or additions I made are in red.
1 and 1/2 cups flour (1 ¼ cup flour, ¼ cup ground Abuelita chocolate)
1/2 cup sugar
2 teaspoons baking powder
1/2 teaspoon salt
1 tablespoon instant Espresso
1 tablespoon boiling water
1/2 cup butter, melted
1 egg1/3 cup milk
1 teaspoon vanilla extract
Topping:
1/4 cup packed brown sugar
1/3 chopped almonds (I didn't have almonds, so I used pecans)
3 tablespoons flour
1 and 1/2 tablespoons butter
Glaze (recipe follows)
Preheat oven to 375 degrees.
In a large bowl combine the flour, sugar, baking powder, and salt. In a small bowl dissolve the Espresso in the boiling water. Add to flour mixture with the butter, egg, milk, and vanilla. Stir to combine, don't over mix. Batter will be thick.
Fill muffin tin/baking cups 3/4 of the way. Sprinkle with the topping, dividing equally among the muffins, press into batter gently.
Bake for 18-20 minutes until toothpick comes out clean. Drizzle with glaze.
Glaze:
1/2 teaspoon instant Espresso
1 teaspoon boiling water
1/4 cup packed brown sugar
vanilla extract, a drop (1 drop Abuelita syrup)
1/4 cup confectioners' sugar
2-3 teaspoons milk
Dissolve the Espresso into the boiling water in a small bowl. Add the brown sugar and use a fork to combine the two. Add a drop of vanilla. Add the confectioners sugar and 2 teaspoons of the milk. Whisk until well combined. If glaze is thick add another teaspoon of milk. Whisk. Drizzle over the warm muffins.
Mexican Chocolate Mocha Frappuccino
(original recipe from Recipe Zaar)
2 large glasses
1/2 cup milk
2 tablespoons chocolate syrup (Abuelita syrup)
1 tablespoon granulated sugar, plus
1 teaspoon granulated sugar (do not use if your using Mexican Chocolate)
1/3 cup strong coffee ** (I used my small French Press to make some VERY strong coffee)
1 cup ice
In a blender, combine everything but the ice, and blend until sugar has dissolved.
Add ice and blend until smooth (sometimes you will need a bit more ice).
Amazing how a few ingredients you probably already have in your pantry can save you 3 to 4 dollars at the coffee shop!
French Press
2 rounded tablespoons coarse grind coffee beans
4 ounces water (195 degrees)
This will make 1/3 to ½ cup of strong coffee.
*********************
"If I eat equal amounts of dark chocolate and white chocolate, is that a balanced diet?"
Wednesday, August 5, 2009
Lily’s No-Bake Dulce de Leche Cheesecake
I’m a sucker for food magazines, even if there are only one or two recipes that catch my fancy when leafing through it. Woman’s World magazine, the one you find at the checkout counter at the grocers, had this wonderful looking no bake cheesecake recipe in it. It’s called “No-Bake Mexican Flan Cheesecake”. Well, my daughter being my daughter and always looking to modify and adapt to her tastes (I taught her that!), she decided to top the cheesecake with that wonderful Dulce that Leche sauce we made a couple of months ago. Instead of using almond cookies, she used crushed Oreos. Needless to say, it turned out quite tasty. As you can see, this recipe just begs to be modified any way you like. Various toppings – various fruits – various bottom crusts. I hope you give it a whirl. Enjoy.
Lily’s No-Bake Dulce de Leche Cheesecake
(Inspired by recipe found in Woman’s World Magazine, July 27, 2009)
1 dozen Oreo cookies
¼ cup butter, melted
2 tablespoons honey
1 tablespoon vanilla
1 envelope (1/4 ounce) unflavored gelatin
3 packages (8 ounces each) room temperature cream cheese
1 can (14 ounce) sweetened condensed milk
¼ teaspoon ground cinnamon
¼ teaspoon salt
3 cups Cool Whip
Dulce de Leche Sauce
Strawberries
Coat an 8-inch spring form pan with non-stick cooking spray.
Pulse Oreos in a food processor until crumbs form. Add melted butter until well combined. Press firmly into bottom of pan.
In a small microwave-safe bowl, combine honey, vanilla and 1 tablespoon water. Sprinkle gelatin over mixture and let stand 5 minutes. Microwave 5 seconds and stir until gelatin is dissolved.
Beat cream cheese and milk on medium high speed until smooth, about 2 minutes. Beat in gelatin mixture, cinnamon and salt, about 1 minute. Fold in 2 cups of the Cool Whip and spread cheese mixture in prepared pan. Cover with plastic wrap for 8 hours or overnight.
Run a knife around the edge to loosen. Remove sides of pan. Transfer to a serving plate and spread Dulce de Leche sauce over the top allowing some of the sauce to drip down the sides. Top with the last cup of Cool whip and garnish with strawberries.
Monday, July 13, 2009
Cool Chocolate for Hot Summer Nights
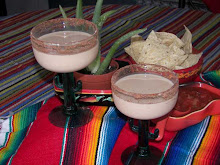
There's not one person who knows me who doesn't know that this is my all time favorite chocolate cocktail. The Mexican Chocolate Margarita. It's tasty, it has a nice little bite to it (because of the chipotle powder), it's refreshingly cool, and best of all - it's chocolate.
It's quite simple to make and you can whip up a batch of these tempting little drinks in no time at all.
Mexican Chocolate Margarita
First recipe:
Chocolate Chipotle Powder, recipe follows
1½ ounces dark chocolate liqueur
1½ ounces chocolate vodka
1½ ounces tequila
1½ coffee flavor liqueur
Chocolate Chipotle Powder
2 tablespoons Mexican Chocolate ground into powder
1 tablespoon ground chipotle powder (or red chile powder if you prefer)
Mix completely and set aside.
Spread the Chocolate Chipotle Powder out on a large plate. Rim 2 (8-ounce) martini glasses by rolling the edge of each glass on a clean wet sponge, then rolling the edge over the powder. Tap the glass gently to knock off the extra powder. Pour the rest of the ingredients into a cocktail shaker filled with ice and shake vigorously until the outside of the shaker is frosty. Strain immediately into the glasses and serve.
Second recipe:
¾ cup half-and-half or light cream
8 ounces dark chocolate liqueur (1 cup)
2 ounces vodka (1/4 cup)
Ice cubes
2 tablespoons ground Mexican Chocolate
¼ teaspoon ground cinnamon
Mix ground Mexican Chocolate and cinnamon. Spread on a plate. Moisten rim of martini glasses with a wet sponge and dip into the chocolate-cinnamon mixture.
In a pitcher, stir together the half-and-half or light cream, chocolate liqueur, and vodka. Place ice cubes in a martini shaker. Add liqueur mixture; shake. Strain mixture into four to six chilled martini glasses
Are the kids giving you the evil eye while you enjoy your moment of pleasure with your Margarita??? No worries. Mix up a batch of Mocha Milkshakes (made with some Mexican chocolate) to keep them happy.
Mocha Shake
1 cup cold milk
1 cup strong black coffee, regular or decaf
1/2 cup Mexican Chocolate sauce*
1/2 teaspoon ground cinnamon
2 pints coffee or vanilla flavored ice cream
Whipped cream Strawberries for garnish, optional
To a blender, add 1/2 cup of milk, 1/2 cup of coffee, 1/4 cup of chocolate sauce, and the cinnamon. Puree to combine ingredients. Add 1-pint ice cream and blend until smooth. Pour into 2 frosted fountain glasses or tall glasses and garnish with swirls of whipped cream, an extra pinch of cinnamon, and strawberry and serve. Repeat to make 2 more shakes. Makes 4 servings.
*Mexican Chocolate Sauce:
1-cup whipping cream
½-cup sugar
1 round disk Mexican Chocolate, chopped
¼ teaspoon ground cinnamon
Put all ingredients into medium saucepan. Heat until steaming but not boiling. Stir constantly to melt chocolate. Remove from heat and allow to cool 2 to 3 minutes.
Of course you could make some Mexican Chocolate Ice Cream to use instead of the store-bought. What ever is easier and most pleasing for you. Cooking and baking should be a pleasure..NOT a chore.
Mexican Chocolate Ice Cream
12 ounces Mexican Chocolate, coarsely chopped
4 large egg yolks
1/3 cup sugar
1 quart half and half
1 tablespoon vanilla extract
In the top of a double boiler, over hot, not simmering, water, heat the chocolate, stirring often. It will not completely melt but will soften into a gooey mass.Meanwhile, in a large bowl, whisk the egg yolks. Gradually whisk in the sugar.In a medium heavy pan over high heat, bring the half and half just to a boil. Whisking constantly, gradually add the hot half and half to the egg mixture. Return this mixture to the pan, set the pan over low heat, and cook, stirring often, until the mixture thickens into a custard that will heavily coat the back of a spoon, about 5 minutes. Immediately remove the pan from the heat and return the custard to the bowl. Add softened chocolate and vanilla and whisk until dissolved (the mixture will appear grainy). Cool to room temperature and cover with plastic wrap, pressing the film onto the surface of the custard. Refrigerate until very cold, at least 5 hours and preferably overnight. Transfer the custard to the canister of an ice cream maker and churn according to the manufacturer's directions. Cover the finished ice cream tightly and store it in the freezer.
What ever type of ice cream you choose to use, allow it to put a smile on your face. Life's too short to keep yourself from enjoy some of life's simple pleasures...like chocolate.
Enjoy!
Tuesday, July 7, 2009
Mi Chita's Mexican Chocolate Recipes
Mi Chita's Mexican Chocolate Dessert Recipes is an ebook-cookbook. It is filled with dessert and beverage recipes that use Mexican chocolate. Mexican chocolate has a unique taste, featuring a hint of cinnamon and almonds, and differs from the taste of regular baking chocolate. This ebook features dessert and beverage recipes, including "The Greatest Cheesecake Ever--Mexican Chocolate Kahlua Cheesecake." Other recipes include cakes, cookies, snacks, cocoa, a chocolate Martini and more-- all with the flavor of Mexican chocolate.
Why an E-Book?
Our first cookbook, Aprovecho, A Mexican-American Border Cookbook, was published in the traditional way. Hardcopy and paperback versions of the cookbook are still available on-line at Amazon and in bookstores.
"For this cookbook, we decided to publish in an Ebook-Format in order to make it less expensive than our Aprovecho Cookbook. Cost reduction from traditional publishing allows us to sell the ebook for only $3.95. It's less expensive for those purchasing it, while we make the about the same as we would for each copy of Aprovecho that is sold. Everyone wins.
Where can it be purchased?
Mi Chita's Mexican Chocolate Dessert Recipes can be bought on Michita's Page. Payment can be made with a Pay Pal account or with most credit cards.
Mex Choc Brownies | Champurrado |
Mex Choc 3 Leches | Rum Mousse |
Drizzled Popcorn | Kahlua Cheesecake |
Mex Choc Martini | Mocha Shake |
These photos are just a sampling of some of mouthwatering recipes found in our Mi Chita's ebook. To view all the photos, take a moment to view the Picassa slideshow located over the right of this blog page. Hopefully it will entice you to make the small investment of $3.95 in order to savor the sweet and distictive flavor of Mexican Chocolate.
Can you think of a better way to impress your boss, in-laws, co-workers or neighbors than inviting them to dinner and offering this sweet ending to a fabulous meal? There is absolutely nothing that compares to making someone feel so special, just don't tell them how simple it was to prepare. If they want the recipe, send them here.
Before you know it, you and your Mexican Chocolate desserts and drinks will be the envy of all who love chocolate.
*** FREE RECIPE ***
Mexican Chocolate Shortbread Cookies
1 cup (2 sticks) softened butter
½ cup sugar
1-teaspoon vanilla
2 to 2½ cups flour
¼ cup cocoa, plus a little extra
1 disk Mexican Chocolate, finely ground
Drizzle Mix:
1 cup chocolate chips
¼ cup Mexican Chocolate, ground
1 teaspoon shortening
Cream butter and sugar together. Add vanilla.
In a separate bowl, combine flour, cocoa, Mexican Chocolate, and salt. Slowly, add flour mixture to butter mixture and knead to combine well.
Chill dough in refrigerator for 30 minutes for easier handling.
Roll out a small portion of the dough between two pieces of wax paper or parchment paper to ¼ inch thickness.
Dip cookie cutter in flour or cocoa powder and cut out desired shapes. Place cookie shapes on ungreased baking sheet. Refrigerate for 30 minutes to help cookie hold its shape when baked. Bake for 10 to 12 minutes (middle of oven) at 325°. Cool completely before drizzling with chocolate Drizzle mixture. Makes about 1 ½ to 2 dozen, depending on size of shapes cut.
Drizzle Mix:
Combine chocolate chips, Mexican Chocolate, and shortening in a microwave safe bowl. Microwave for 30 seconds. Remove and stir until melted. If not completely melted, microwave for 10 to 15 seconds more. Cool for 2 minutes. Pour melted chocolate into a zip lock plastic bag. Zip bag closed. Snip a tiny piece off the corner of the plastic bag. Drizzle over completely cooled cookies.